Showing posts with label Being a little more GREEN. Show all posts

Friday, April 9, 2010

Look Ma - No Iron…

I’ve been taking these pieces parts… and there are lots of them!

look no iron 002

and making them into these blocks…

look no iron 003

…and I haven’t left my seat to go over to the iron.  I’ve been using this little gadget…

look no iron 001

The roller I got with the Curve Master Foot the other week at the show.  It works really well at squashing those seams into place.  I’m loving me this little roller!

And… I’m not using any energy to heat the iron… and therefore I’m also not heating up my studio… which has been an issue with the 80 degree temps earlier this week. 

Sunday, May 3, 2009

And the Winner is...

Everybody who commented about Taking the Paper Out of Paper Towels!

I appreciate that y'all took the time to comment and tell me what you are doing to be a bit easier on our dear little planet.

I had gone up and counted up what I have cut and washed and I have enough to send out 4 sets of Faux Paper Towels.

So Kim, Sheila, Gizmo and Bon... please email me your address and I'll get these in the mail to you!

Congratulations and Thanks Again!

Wednesday, April 22, 2009

Eliminate the Paper in Paper Towels

If I was really clever I would have thought earlier to write up a post for Earth Day... but... but... Don't Cry for Me.... ummmm I've been busy and have other things on my mind... Argentinaaaaa....

Sorry.... anyway... back to thoughts of Earth Day!

Have you seen my previous post on making Faux Paper Towels?

Please go and take a look... and you know what?  I'm going to give some of these away!

Everyone who comments on this post between now and the end of the day April 30th will have the opportunity to win a set of 20 Faux Paper Towels! 

Tell us in your comment what you are doing differently to be a little more gentle on our environment.  Make sure I have a way to contact you via email - I'll announce the winner during the day Friday May 1st.

Tuesday, September 9, 2008

I got Sauced Last Night...

Yep, Apple Sauced!

Last Saturday evening my neighbor Mrs. B came across the driveway asking me if I could help her out.  She had a bucket full of Jonathan Apples that the wind and rain we'd had earlier that day had knocked off her trees and she already had '2 bins full and can't use no more'.  So in the interest of being a good neighbor - I took them!

Things here at the Stone House are not all fun and games painting and fixing these days... I've managed to fit in some other things - like canning.

Yes, canning!  I had done a bit of that years and years ago when we lived here in PA and my husband was a college student.  There are a couple stories from that era I'll have to tell y'all another time.

A couple weeks ago I found my canning pots (yes I seem to own 2 - although I think one was something I got in a box of stuff at an auction a couple years ago) and dug out some other supplies I still had.  Bought a new Ball Blue Book of Preserving, a variety of jars, a Food Mill, a thermometer and a few other little gadgets.  You know it's all about the gadgets... right?

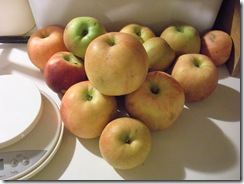
Anyway last night I had 12 pounds of Apples to contend with... Applesauce 001these are the second batch ready to be washed and cut up into quarters.  Into the pot they went with a bit of water to soften up.
Since I had loaned my food mill to my sister Darlin' for her canning adventures I was going to go and purchase another one... but then I saw a 'Sauce Master Food Strainer' for about the same amount of money... so I got it.  Didn't think to stop and take pictures of using it... boy does it work quick.  Applesauce 007
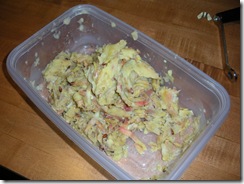
 

In no time at all I had smooth sauce in one container and seeds and skins in the other... this is the waste from 12 pounds of apples - that's all that I threw away.
 

Applesauce 003


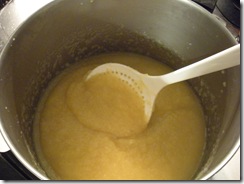
Here is the sauce cooking in the pot - the first batch was so thick I had to add back some of the liquid the apple quarters had cooked in - sure glad I saved some back.  Even then it didn't so much as boil as it 'plopped plopped' and splattered sauce about.

I was a little more generous heaping ladles full of apples and liquid into the Strainer with the second batch - gave me something to bring to a boil easier.Applesauce 009
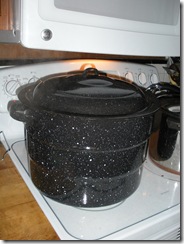
I added a bit of sugar to each batch and added cinnamon to the second batch.  What didn't fit into the canning jars went into some plastic freezer jars that we'll use up first - all total I have about 8 pints of each variety.

I have a much better appreciation for people who have a 'canning kitchen' - yep all this boiling water and cooking pots of stuff... sure does make it warm.

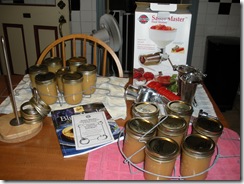
By midnight I was done and headed off to bed... here are the two batches this morning all cooled off and ready for labels of some sort.  I need to look for some computer labels... of course then I'd have to unpack my printer and set it up too... maybe I'll just buy a new permanent marker...
Applesauce 016


Hey - did you see what I'm using as my lid-ring holder - yep my former paper towel holder... which I don't use for paper towels because I use my faux paper towels... a re-purposed device - cool huh?


Soon I'll show you what started all this re-newed Domestic Divaness on my part...

It's a sweet story with a sad part in the middle... very sad indeed... It's so hard to talk about... (gulp) maybe next time.

Saturday, April 5, 2008

A Little More Green... faux paper towels

Yeah I know that sounds kinda weird... faux paper towels?

Problem is that I became a 'Paper Towel Junkie'.  I didn't start out like that - early on we never wasted spent money on paper towels.  I used a lot of dish towels - but they are often too big for what I want and too thick and don't dry quickly.

Then we started getting those folded paper towels (from Costco) to keep in the kitchen and over time I used them more and more.  By the time we moved from Massachusetts I was using them for just about everything... I had gotten outta control.

I'm trying to be better about how I impact my environment and knew that my paper towel usage had to stop.  But I still don't like the size and weight of dish towels. 

When I unpacked my cloth napkins and started using them again at meals I began to ponder... I figured I could replace my paper towel usage with cloth towels but I didn't want to spend a lot of money on fabric or spend time finishing the edges on the 'faux paper towels'.

My solution:

  • Buy discounted fabrics - clearance or 2nds are great
  • Cut the fabric on the bias... no need to finish the edges because they will NEVER fray, never shed any stray threads... NEVER!faux paper 012

I've run through 3 trials to test out my ponderings...

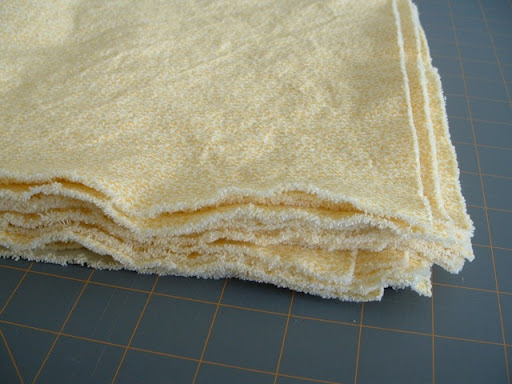
For my first set of 'faux paper towels' I purchased 2 yards of a cheery yellow print that was supposedly a second... personally I couldn't find anything wrong with the yardage I bought - nice at $1.69 a yard.

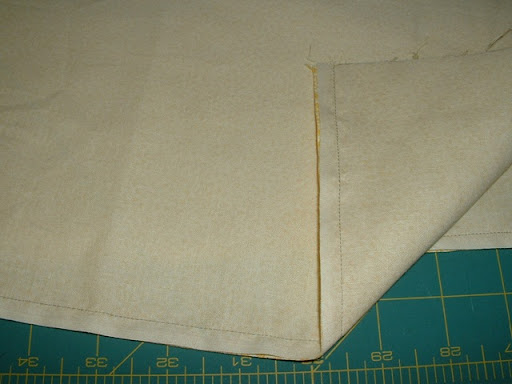
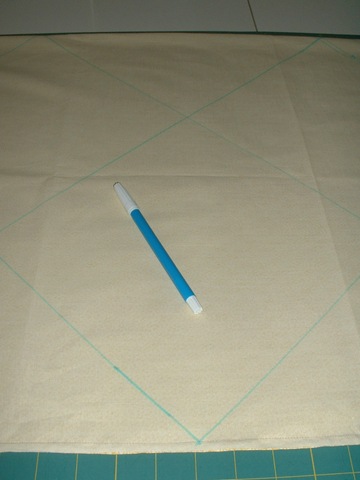
I wanted to try and use as much of the fabric as possible so I sewed the selvedges together faux paper 001 and then cut on the bias (45 degree)faux paper 005 so that my squares were approx. 10 inches square.  This way you got a square from the folded edge and the sewn selvedge edge.faux paper 010   If you wanted to have scraps to use for quilting then don't worry about sewing the selvedge edge together and throw the triangle pieces in the scrap bin.  

faux paper 017

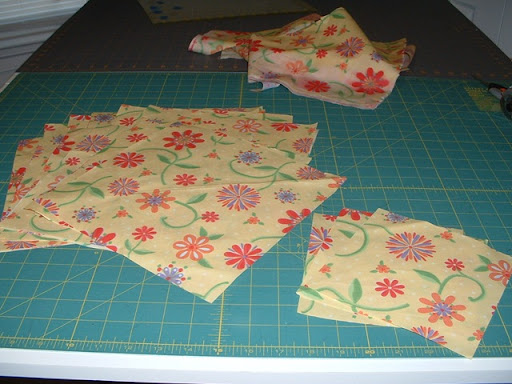
My second trial was from a happy floranapkins 001l print that had a very evident 'blurrrry' print effect along the selvedge edge.  But at 1.69 a yard I didn't care - I didn't bother to sew that edge together.  Again a 2 yard cut - and I ended up with 22 squares at 10".  I also cut some of the larger leftover triangles from the edges down to makenapkins 005 a few

little napkins for my granddaughter to use - I was able to cut these about 6" square.   I didn't get many - but she'll be happy anyway!

My third trial was a pink 30's print - again from the seconds rack that I didn't find any flaws in my 4 yard cut.  I didn't sew napkins 006the selvedge edges together (couldn't be bothered) and from the edge scraps I cut pieces that measured approx. 5" x 6" - again figuring these would be great little napkins for my granddaughter to use - she loves pink!

  napkins 0011


I'm going to send the floral set to my daughter and some of the pink ones too. 

I love it that now I have lots of faux paper towels to use in the kitchen for what ever I want and don't have to feel guilty.  I can grab one to wipe down the counters - no more icky sponge or dish cloth.  Rinse it out and because they are thin they dry quickly so can go in the hamper and not get moldy.  My dish towels can be for drying pots and I can use these to dry my hands and therefore always have something clean and dry to use.

I can grab one for under my coffee cup and use one as a lunch napkin too or dry off that apple I just washed.

Throw them in the wash with all your other towels - remember no fabric softener in your towels if you want them to remain absorbent.

You could cut them bigger if you wanted to use them as regular napkins - I really like the unfinished no work at all edge to them.  Just remember your cut edges have to be on the bias and they will not fray.

Sunday, March 16, 2008

On being a little more Green...

A while back a quilty friend Tami mentioned on her blog about her efforts at being a little more Green - more energy efficient - less wasteful - a little easier on the earth. She pictured a basket in that post with her cloth napkins.

That picture made me go up and unpack my cloth napkins. On a shopping trip a week or two later I picked up a woven napkin holder for myself. It's actually a napkin holder made for paper napkins... (we won't even go into how lame and useless paper napkins have become) but the all cotton napkins I made several years ago fit pretty well thank you. These are the ones hanging out in there right now... all made probably 6 or 8 years ago, they've seen hundreds of slices of pizza, many pans of nachos, countless bowls of soup, a fair number of burgers and hot dogs as well as any number of other everyday meals. They have been washed over and over again. Nothing special to it - just throw them in with all the other towels getting washed.
So in the interest of being a little more Green: Here is a quick primer on making your own Everyday Napkins. Trust me - once you start using these napkins you'll never like using paper napkins again. The more you wash these cotton napkins the softer they get - if you are having a special event feel free to iron them to spiff them up a bit - otherwise enjoy the cozy softness of them as they are. Oh and as it is with towels... don't use fabric softener in the washer or dryer - it will make them less absorbent over time. Oh and don't be tempted to get any poly/cotton fabric... it always feels rough and isn't as absorbent as 100% cotton.

Here is how I'd get 9 napkins out of 1.25 yards of cotton fabric.

Several years ago when I made my napkins I used my serger to finish the edges. Since I was going to be trimming as I added my woolly nylon rolled edge I would tear my fabric into 13.5" squares. If you prefer to cut - go right ahead. Tearing at 13.5" gave me a little to trim off all around.

If you are turning under your edge and making a regular stitched down hem (double fold) - you might plan to cut at 14 inches to allow a little more for the hem.

I went up and whacked the edges off an old napkin I have that has a rip in it... so here's a quick primer on turning under an edge - it isn't perfect but hey it's my first whack at doing it this way.

I started my stitching in the middle of an edge - this way when I get all the way around all the corners will be finished off nicely. Just turn it under about a quarter of an inch and fold it again. I wouldn't bother trying to iron it because you'll just burn your fingers and it won't be any fun.
Stitch the edge down right off the end... well OK I did miss on those last couple stitches but I'm turning those under anyway... so pretend you don't see those - OK?Pull it out from under the needle and fold the next edged down - OK yeah I need a manicure but who has time or money for that? LOL - what I need to do is go back to using my lotion more often. Don't be distracted by my dry hands and ragged cuticles...
I usually put the needle down so that I'm starting to sew about 1/8 of an inch down and I BACK STITCH to the top edge and then go forward - this helps to lock in the stitches. I also learned something here I want to pass along to you. It ain't easy stitching this folded corner... and after fussing with it a couple times - I stuck a piece of paper under the edge and the machine then had a bit more to grab hold of and I had something to hold onto as well to help guide it.
Then you just pull the paper off. Cool huh?


Ta Da! OK - my corners aren't perfect - but ya know what - the more that I would do like this the better I'd get at doing them. This is my very first folded hem napkin... so I'm thinking you can do it too. I'll bet you could have a cornucopia of napkins if you went through your bin for any 14 inch leftovers from quilting projects. Yeah wouldn't those be fun to use.